
Identifying Water Damage in Ceiling Tiles
Signs of Water Damage – How to spot stained, sagging, or discolored tiles
Water damage can strike unexpectedly, turning a once pristine ceiling into a patchwork of stained and sagging tiles. Recognising the signs early is crucial in understanding how to repair ceiling tiles with water damage effectively. Discolouration often manifests as yellowish or brownish patches, betraying moisture infiltration long before structural issues become apparent. Sagging tiles, flimsy and drooping beneath their own weight, signal ongoing water intrusion that weakens the ceiling’s integrity.
Inspect your ceiling carefully—look for warped edges or tiles that loosen easily, as these are clear indicators of water compromise. Sometimes, the damage is subtle, hidden behind a layer of paint or texture, so a gentle tap might reveal hollow sounds or soft spots. Staying vigilant about these signs ensures prompt action, preserving the ceiling’s aesthetic and safety. Knowing how to spot water damage in ceiling tiles is the first step toward an effective repair.
Common Causes of Water Damage – Leaks from plumbing, roof leaks, or HVAC condensation
Water damage to ceiling tiles often originates from hidden sources, lurking behind walls or above the ceiling, making it a silent threat that can escalate quickly. Understanding the common causes of water ingress is vital if you’re wondering how to repair ceiling tiles with water damage effectively. Plumbing leaks from pipes or fixtures frequently seep into the ceiling cavity, gradually weakening the tiles’ structure. Roof leaks, especially during relentless rainstorms, can cause persistent moisture infiltration, leading to discolouration and sagging. HVAC systems, if not properly maintained, can generate excess condensation, which drips onto ceiling tiles and causes damage over time.
Identifying the root cause is essential and sometimes involves a bit of detective work. Here are the most prevalent culprits:
- Leaking plumbing fixtures or pipes
<li Roof penetrations or damaged shingles
<li Excessive condensation from HVAC units
Knowing these common causes can help you anticipate the issue and address the underlying problem—an important step when tackling how to repair ceiling tiles with water damage. Ignoring these factors risks repeating the cycle of damage and costly repairs.
Evaluating the Extent of Damage – Determining whether tiles are repairable or need replacement
Water damage to ceiling tiles can often seem like a silent predator—initially subtle, but capable of wreaking havoc if left unchecked. Recognising the extent of the damage is crucial in understanding how to repair ceiling tiles with water damage effectively. It’s not merely about surface stains or sagging but about delving beneath the affected layer to assess the true condition of the structure behind. Damage can range from superficial discolouration to complete structural compromise, making the difference between a simple fix and a costly replacement.
To determine whether ceiling tiles are salvageable or require total replacement, start by inspecting the tiles closely. Look for signs of mould, persistent dampness, or crumbling edges. Gently tap the tiles—if they sound hollow or brittle, it’s a sign that the underlying material has been compromised. For a more precise evaluation, consider the following:
- Assess the visual integrity—discolouration, sagging, or warping often indicate extensive water infiltration.
- Check for mould or mildew, which suggests ongoing moisture issues.
- Evaluate the severity of damage—if the tile crumbles easily or feels soft to the touch, replacement is likely necessary.
Sometimes, the damage appears superficial, and the tiles can be cleaned and repaired. However, in many cases, the underlying cause—be it a plumbing leak or roof ingress—must be addressed first. Understanding how to repair ceiling tiles with water damage hinges on accurately evaluating the damage’s depth and scope, ensuring that repairs restore not just appearance but also the integrity of the ceiling’s structure.
Preparing for Ceiling Tile Repair
Safety Precautions – Using protective gear and turning off utilities
Before diving into how to repair ceiling tiles with water damage, it’s crucial to prioritize safety. Water-damaged ceilings can be unpredictable—think of them as the diva of the home improvement world, prone to dramatic sagging or unexpected collapse. Wearing protective gear is your first line of defence; goggles, gloves, and a sturdy dust mask are non-negotiables. These items shield you from mould spores, dust, and potentially falling debris, ensuring your repair adventure doesn’t turn into a health hazard.
Next, turn off utilities—water, electricity, and even gas if necessary. It’s better to be safe than electrocuted, after all. Water and electricity are a volatile cocktail, and a small spark can turn a DIY fix into a trip to the emergency room. Remember, when handling water damage, the goal is to avoid further complications. As you prepare to learn how to repair ceiling tiles with water damage, this safety groundwork keeps the process smooth, sensible, and, dare I say, somewhat enjoyable despite the watery chaos.
Gathering Necessary Tools and Materials – Replacement tiles, safety goggles, ladder, utility knife, adhesive, stain-blocking primer
Preparing for ceiling tile repair is a delicate dance between necessity and caution. Before embarking on the journey to restore a water-damaged ceiling, gathering the right tools and materials is paramount. It’s a process that demands precision and patience, for water damage can be insidious, lurking beneath the surface like a dark secret waiting to unravel.
Begin with the essentials: replacement ceiling tiles, safety goggles, a sturdy ladder, a utility knife, and adhesive suited for ceiling repairs. To combat stubborn stains and prevent mould from marring your efforts, a stain-blocking primer is indispensable. As you assemble your arsenal, consider this order of operations:
- Secure a reliable ladder—heightened caution is key when working overhead.
- Prepare your replacement tiles, ensuring they match the existing aesthetic and size.
- Equip yourself with safety goggles and a dust mask, for the air around water-damaged ceilings can be perilous.
A comprehensive collection of these items not only expedites the repair but also shields you from the shadows of potential hazards. When you understand how to repair ceiling tiles with water damage, every tool becomes a vital instrument in banishing the moisture’s sinister touch.
Assessing Damage Area – Measuring and marking affected tiles for removal
Before starting the repair process, accurately assessing the damage area is crucial. Water damage can be deceptive; what appears superficial may hide deeper issues. Take a moment to evaluate whether the water has compromised the structural integrity of the ceiling tiles or if only surface stains are present. This step ensures you know exactly how much needs replacing or repairing.
Measuring and marking the affected tiles is a straightforward but vital step. Use a pencil or chalk to outline each tile that shows signs of water damage. This visual guide makes removal easier and prevents accidental damage to surrounding tiles. When marking, consider overlapping the edges slightly to account for potential expansion or hidden moisture beneath the surface.
For larger damage zones, an ordered approach can streamline the process:
- Identify all water-damaged tiles through visual inspection.
- Mark each tile with clear, visible lines for removal.
- Double-check measurements to ensure consistency across the damaged area.
Accurate assessment and precise marking are key to understanding how to repair ceiling tiles with water damage efficiently and effectively. This careful approach reduces risks and helps ensure a seamless restoration process. Remember, water damage is often insidious—spotting every affected tile early makes all the difference.
Removing Damaged Ceiling Tiles
Careful Detachment of Tiles – Techniques for removing tiles without damaging surrounding areas
Removing water-damaged ceiling tiles requires a delicate touch and a strategic approach. Rushing in with brute force might cause unintended damage to surrounding tiles or the ceiling structure itself. Instead, approach the task with patience and a clear plan. Carefully loosen the edges of the affected tiles, working gently to avoid dislodging adjacent tiles or causing further structural compromise.
One effective technique involves using a utility knife to score along the grout lines or seams, making it easier to detach the tile without cracking or tearing. For tiles that are stubbornly adhered, applying a bit of warm water or a specialised adhesive remover can soften the bond, facilitating a safer removal process. Remember, the key to learning how to repair ceiling tiles with water damage lies in controlled, precise movements rather than forceful prying.
- Start from one corner or edge of the tile.
- Gently insert the utility knife or a flat pry tool beneath the tile’s edge.
- Slowly work around the perimeter, applying even pressure to lift the tile away from the ceiling grid or adhesive.
By employing these careful detachment techniques, you minimise the risk of damaging the ceiling or neighbouring tiles, setting a solid foundation for effective repair or replacement. This method ensures you handle water-damaged tiles with the respect they deserve, paving the way for a seamless restoration process in your ceiling repair project.
Disposal of Water-Damaged Tiles – Proper disposal to prevent mold spread
Once the water has been coaxed away and the damaged tiles carefully removed, the next vital step is the proper disposal of these compromised materials. Water-damaged ceiling tiles can harbour mould spores and bacteria that pose health risks if not handled correctly. Disposing of these tiles responsibly is crucial to prevent the spread of mould and protect your living environment. Always double-bag the tiles in heavy-duty plastic before discarding them in your outdoor waste bin, ensuring no spores escape into the air.
Remember, contaminated tiles should never be left in the home or composted. For added safety, wear protective gloves and a mask during disposal, especially if mould growth is visible. If your home has experienced extensive water damage, consider consulting local waste management guidelines or professional disposal services. Proper disposal not only safeguards your health but also preserves the integrity of your restoration journey, making it an essential component of the process of learning how to repair ceiling tiles with water damage.
Inspecting the Ceiling Cavity – Checking for ongoing leaks or mold growth
Before embarking on the journey of how to repair ceiling tiles with water damage, a crucial inspection awaits—peering into the depths of the ceiling cavity itself. This hidden space often harbours the true extent of the catastrophe. Darkness and dust conceal potential ongoing leaks or lurking mould that threaten to reignite the damage if left unchecked.
Using a sturdy ladder and a reliable torch, gently pry away the remaining tiles to reveal the cavity. Look for signs of persistent moisture, such as damp patches or mould colonies creeping along joists. It’s vital to determine if the source of water has been fully eradicated—otherwise, the cycle of destruction will continue.
In this shadowed realm, consider the following steps to ensure thorough assessment:
- Scan for ongoing leaks from plumbing or roofing systems.
- Identify blackened or fuzzy mould formations, indicating active contamination.
- Check for sagging or warped joists, signalling prolonged water exposure.
Only by exposing the true extent of the damage can one hope to tame the chaos of water intrusion and prevent further deterioration when learning how to repair ceiling tiles with water damage.
Treating the Underlying Cause of Water Damage
Addressing Plumbing or Roof Leaks – Contacting professionals or DIY fixes
When the roots of water damage run deep within the architecture of your space, addressing the underlying cause becomes paramount. If a plumbing leak or roof failure is the culprit, unearthing the source requires a vigilant eye and a steady hand. Sometimes, the fix is simple—a DIY patch for a minor leak—yet other times, professional intervention is essential to stem the flow of water and prevent further decay. Remember, ignoring the root cause risks an endless cycle of damage, making your efforts to learn how to repair ceiling tiles with water damage futile in the long run.
In scenarios where the leak’s origin is obscure, enlisting a professional plumber or roofing expert can be a wise choice. They possess the keen expertise to pinpoint leaks that may be hidden behind walls or within the roofing structure. Conversely, if the damage appears superficial and manageable, a methodical DIY approach can sometimes suffice. For example, sealing small plumbing joints or patching minor roof cracks may temporarily halt the water ingress while more permanent repairs are scheduled. Just ensure safety remains your guiding principle—turn off water supplies and wear protective gear to guard against mould and debris.
Moreover, considering the importance of addressing the water source swiftly, it’s advisable to undertake a thorough assessment of your property’s vulnerable spots. This proactive step not only curtails ongoing damage but also preserves the integrity of your ceiling tiles and surrounding infrastructure. When in doubt, collaborating with professionals ensures that every facet of water intrusion is remedied, paving the way for a more resilient space and a smarter approach to how to repair ceiling tiles with water damage in the future.
Drying the Area – Using fans, dehumidifiers, and proper ventilation
When water damage strikes, the battle isn’t solely about fixing the visible signs but also about treating the underlying cause. Moisture lingering in the ceiling space can quickly lead to mould growth and further structural deterioration. Effective drying is the cornerstone of preventing recurring issues and ensuring your repairs hold firm over time. Using a combination of fans, dehumidifiers, and proper ventilation, you can accelerate moisture removal and restore the space’s dryness.
To optimise the drying process, consider implementing a strategic approach:
- Position fans to circulate air across affected surfaces, avoiding stagnant pockets of humidity.
- Deploy dehumidifiers to extract excess moisture from the air—this step is vital in enclosed spaces.
- Ensure ventilation pathways are open, allowing moisture to escape and fresh air to circulate effectively.
In some cases, it’s beneficial to use a combination of these tools over several days, monitoring moisture levels meticulously. This concerted effort not only reduces the risk of mould but also prepares the ceiling for subsequent repairs. When contemplating how to repair ceiling tiles with water damage, remember that thorough drying is a critical phase—skimping on it can compromise the longevity of your efforts and lead to recurring issues down the line. Ultimately, tackling moisture head-on with the right equipment and technique breathes new life into damaged ceiling tiles and preserves the integrity of your space.
Mold Prevention and Removal – Cleaning and treating mold-affected surfaces
Water damage is more than just an unsightly stain; it’s a catalyst for mould growth that can silently threaten the health of your home. Once the visible signs are addressed, it’s essential to treat the underlying cause to prevent recurrence. Mold spores thrive in damp, dark environments, making prompt and thorough cleaning of affected surfaces paramount.
Cleaning and treating mold-affected areas isn’t a task to be rushed. Using a proven anti-mould solution, such as a mixture of water and mild detergent or specialised mould remover, can significantly reduce the risk of spores spreading. For stubborn patches, a soft brush can be used to gently scrub the surface, ensuring all mould residues are lifted. Remember, safety comes first—wear protective gear like gloves and a mask to avoid inhaling mould spores or irritating your skin.
To thoroughly prevent mould regrowth, it’s wise to apply a stain-blocking primer over the cleaned ceiling tiles. This barrier not only seals in residual stains but also hampers mould spores from settling and proliferating. Additionally, addressing the source of water intrusion—be it a leaky pipe, roof defect, or HVAC condensation—is crucial for lasting repairs. For persistent issues, consulting a professional ensures that the root cause is eradicated, providing peace of mind that your ceiling will remain dry and mould-free in the future.
In the process of learning how to repair ceiling tiles with water damage, remember that mould prevention is a vital component. Implementing a combination of cleaning, treatment, and moisture control safeguards your space and enhances the longevity of your repairs. With patience and care, you can restore not only the visual appeal but also the safety and integrity of your ceiling.
Repairing or Replacing Ceiling Tiles
Selecting the Right Replacement Tiles – Matching textures, materials, and sizes
Choosing the right replacement tiles is crucial in restoring the ceiling’s aesthetic integrity after water damage. Matching textures, materials, and sizes ensures a seamless blend with existing ceiling tiles, preventing the repair from standing out like a sore thumb. When learning how to repair ceiling tiles with water damage, attention to detail in selecting these elements can make all the difference. For instance, if your original tiles are fibreboard, opting for similar materials avoids discrepancies that could compromise both appearance and durability.
To streamline the process, consider creating a small sample board with potential replacement tiles. This allows you to compare textures and colours side by side, ensuring an impeccable match before installation. If your ceiling features patterned tiles, sourcing exact replicas or custom-cutting new tiles may be necessary. Remember, precise measurement and a keen eye for detail are vital in making sure your repair not only looks professional but also withstands future challenges like moisture ingress.
Applying Adhesive and Installing Tiles – Step-by-step installation process
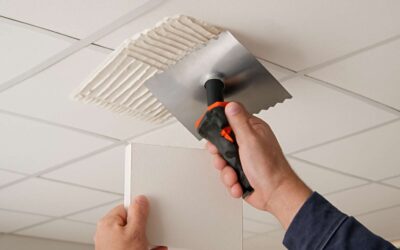
Applying adhesive and installing ceiling tiles with precision is essential to restore both function and form. Begin by ensuring the ceiling surface is thoroughly cleaned and free of dust or debris. Next, evenly spread a high-quality adhesive designed for ceiling tiles, taking care to follow the manufacturer’s instructions. For larger or patterned tiles, alignment is key—use a level or straightedge to position each tile accurately.
When fixing tiles in place, gently press each one into the adhesive, holding it firmly for a few seconds to ensure a strong bond. If you’re working with multiple tiles, consider marking their positions beforehand to maintain uniform spacing and alignment. For added security, especially in areas prone to moisture, some professionals recommend a light application of adhesive around the edges to prevent future lifting or sagging.
Remember, patience and attention to detail during the installation process can turn a water-damaged ceiling into a seamless, visually appealing feature. Mastering the art of how to repair ceiling tiles with water damage involves not just replacing tiles but doing so with care, ensuring longevity and resilience against future water challenges.
Sealing and Painting – Finishing touches to ensure a uniform appearance
Sealing and painting are the final, transformative steps in restoring a ceiling affected by water damage. Once the damaged tiles have been carefully replaced, applying a stain-blocking primer is essential to prevent unsightly stains from bleeding through the new paint. This primer creates a uniform base, ensuring that the finished surface appears seamless and professional. After priming, selecting an appropriate ceiling paint that matches the existing decor helps restore the aesthetic integrity of the space.
To achieve a perfectly blended finish, consider employing a roller with a fine nap for smooth coverage. For areas where the texture of the ceiling requires attention, lightly feather the paint to avoid visible edges. When painting, work in gentle, overlapping strokes, and allow adequate drying time between coats. This patience guarantees a resilient, aesthetically pleasing surface that defies future water damage.
During the sealing and painting process, it’s worthwhile to inspect the surrounding areas for potential vulnerabilities. Address any lingering issues such as cracks or gaps, which could compromise the integrity of your repair. By meticulously finishing with paint and sealant, you ensure your ceiling not only looks flawless but also gains added resistance against future water challenges. Knowing how to repair ceiling tiles with water damage involves these subtle yet critical finishing touches that elevate the entire restoration process.
Preventing Future Water Damage
Regular Inspection and Maintenance – Monitoring for leaks and water intrusion
In the realm of maintaining a pristine interior, vigilant monitoring for leaks and water intrusion stands as the first line of defence against future water damage. Regular inspection not only prevents the escalation of minor issues into costly repairs but also preserves the delicate harmony of your ceiling’s aesthetic. By establishing a routine check—perhaps monthly—homeowners can catch early signs of moisture seeping through, such as faint discoloration or subtle sagging. This proactive approach is essential when considering how to repair ceiling tiles with water damage, as it ensures that problems are addressed before they manifest into widespread decay.
In addition to visual inspections, employing simple tools like moisture meters can provide quantifiable data on hidden dampness within ceiling cavities. For those keen to deepen their understanding, an ordered process can be adopted:
- Inspect for visible leaks or water stains.
- Use moisture detection devices to identify concealed dampness.
- Schedule regular maintenance of plumbing, roofing, and HVAC systems.
Such diligent monitoring acts as a safeguard, enabling swift action and ensuring that your efforts to learn how to repair ceiling tiles with water damage are both effective and enduring. Remember, a well-maintained ceiling not only enhances the visual allure of your space but also fortifies its structural integrity against the relentless march of moisture’s silent assault.
Proper Ventilation and Insulation – Reducing moisture buildup in the ceiling cavity
Moisture lurking within your ceiling cavity can unravel the beauty of your home, turning pristine ceilings into a battleground against water damage. Proper ventilation and insulation are your allies in reducing moisture buildup, which is crucial when considering how to repair ceiling tiles with water damage. Insufficient airflow allows dampness to linger, fostering mould growth and weakening the ceiling’s structure. A well-ventilated space, on the other hand, promotes the evaporation of excess moisture, safeguarding your ceilings from future harm.
To bolster this defence, consider installing exhaust fans or improving existing ventilation systems. Additionally, insulating your ceiling effectively creates a barrier against temperature fluctuations that cause condensation. For those looking to take a more organised approach, an ordered sequence can be beneficial:
- Assess current insulation levels and replace or upgrade where necessary.
- Ensure vents are unobstructed and functioning properly.
- Use moisture barriers in areas prone to high humidity, such as kitchens or bathrooms.
By prioritising proper insulation and ensuring adequate ventilation, you can significantly diminish the risk of water damage, making your home more resilient and comfortable. When water damage occurs, understanding how to repair ceiling tiles with water damage becomes simpler if moisture levels are kept in check, preventing recurring issues and preserving the integrity of your ceilings for years to come.
Immediate Response to Leaks – Promptly fixing issues to prevent recurrent damage
Water leaks can strike unexpectedly, and the aftermath can be equally disruptive. When it comes to how to repair ceiling tiles with water damage, acting swiftly is crucial. Immediate response to leaks not only minimises further harm but also prevents long-term structural issues. Delaying repairs allows moisture to seep deeper, fostering mould growth and weakening the ceiling’s integrity.
Once a leak is detected, it’s vital to address it at its source. Whether it’s a plumbing pipe, a roof fault, or HVAC condensation, stopping the leak halts ongoing damage. Employing a combination of quick fixes and professional assistance can be effective, especially for complex issues. Remember, the goal is to prevent recurring water damage, which makes understanding how to repair ceiling tiles with water damage all the more critical.
To streamline the process, consider implementing a straightforward repair sequence:
- Identify and fix the leak at its origin.
- Dry the affected area thoroughly using fans and dehumidifiers.
- Replace or treat water-damaged ceiling tiles to maintain aesthetics and safety.
Prompt intervention and proper repair techniques ensure that your ceiling remains resilient against future water intrusions. When you understand how to repair ceiling tiles with water damage and respond quickly, you safeguard both your property’s value and your peace of mind.


0 Comments